
When you have successfully completed the installation and then open AutoCAD, the two new ReluxCAD and Relux Interface toolbars will appear on the screen.

Main Menus
Before you start a new Relux project in AutoCAD, you must set the project defaults.
To do this, click the Project button. If you are using ReluxCAD for the first time, the dialog window prompting you to register the program will appear.
Enter your personal registration number in the field provided – you will find this number printed on the rear of the CD. Confirm your entry by clicking on Register.
The Project settings dialog window will now appear.
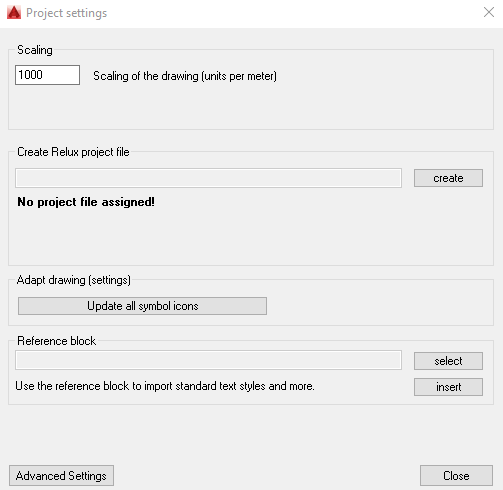
Project settings menu
Enter the number of drawing units per meter in the Scaling field – as specified by the current plan.
If you compile your AutoCAD projects in millimetres, for example, then you should enter 1000 units per meter.
Check this, if necessary, by conducting a measurement on the plan (AutoCAD command “distance”).
The Relux standard symbols will then be automatically scaled to the correct size.
You can override the Scaling symbol if need be, but this will not generally be necessary.
In the Create Relux project file field, you should allocate a Relux RDF file to the current drawing.
A new and still empty file can be created by selecting create.

Menu Project settings
Note: The project file is only needed if you wish to exchange data with Relux. If you have not yet defined a project file,
you will be automatically taken to this dialog when you execute a corresponding command, such as Draw room.
The dialog also offers you the following options:
If the above settings are to be adopted for the symbols, click on the button Update all symbol icons
In the Reference block field, you can enter the path in which the reference block that you have created is located.
A reference block makes it possible for you to import lines and text styles into your project.
Further details on this are provided in the chapter entitled “Luminaire symbols”.
In order to create a Relux project in AutoCAD, you require a defined room which must be made up of a closed polyline.
The Relux Interface toolbar offers you the appropriate tool for doing this.
Press Close to exit the project settings.